Build & Push a Docker Image using Visual Studio Online Build vNext
So I’ve got a nice and simple NodeJs app and I want to have a CI build which builds my Docker image and pushes it to my docker hub ready for deployment. I’ll look at deployment in a future post, this time round we’ll focus on the build process. To get this setup we’ll need to go through two bits, basically VSO uses agents (machines used to execute builds) and a build, which defines some steps that output an artifact (in this case a docker image). So we’ll setup a build agent, where the docker build can run, and then setup the build itself.
Setup the Build Agent
We’re going to need a linux based build agent to build out our docker image and push it to docker hub, as we’re hosting on the linux version of docker. We could also look at using the Windows implementation of Docker, which is available in the most recently Window Server Preview, but I’ll leave this for another day. To do this we can use the ARM templates from the Azure Marketplace in the new portal to spin up an ubuntu VM then install all the bits we need. One the machine is up and running connect up to it via SSH to start install stuff, if you don’t have a client puttys a good bet.
First up let’s install docker on the agent. (full guide https://docs.docker.com/installation/ubuntulinux/ )
sudo curl -sSL https://get.docker. com/ | sh
After the docker install I found I had to reboot the machine to get things to behave.
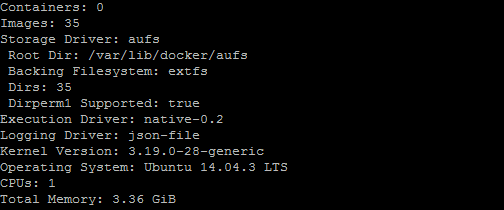
After the reboot, check docker is up and running on the box. Easy way to do this is to type “docker info” at command line and you should get an overview of the Docker install, like so.
Next let’s install the VSO agent so it can pick up and do the builds. (full guide here https://www.npmjs.com/package/vsoagent-installer )
To do this we have to setup apt-get for Ubuntu to install Nodejs:
curl -sL https://deb.nodesource.com/setup_4.x | sudo -E bash -
Then install Nodejs:
sudo apt-get install –yes nodejs
So hopefully that went well and now if you type ’node –v’ you see it all installed! (This may change over time, install docs for npm are here)

Next up we can jump into getting the agent setup script installed, his allows you to create instances of the agent.
sudo npm install vsoagent-installer -g sudo chown -R $USER ~/.npm
Now that’s installed we can use it to create an agent, we’ll just do one as the docker commands are system wide so could cause issues if multiple agents where running on the same box.
mkdir myagent; cd myagent ~/myagent$ vsoagent-installer
Now that’s done we can run the Agent, like so:
node agent/vsoagent
This will prompt you for your vso credentials so it can hook up to your account. If you don’t have them already you’ll need to create a set of “Alternative Credentials” for your account. To do this click your name in the top right in VSO then click on “my profile” then security.
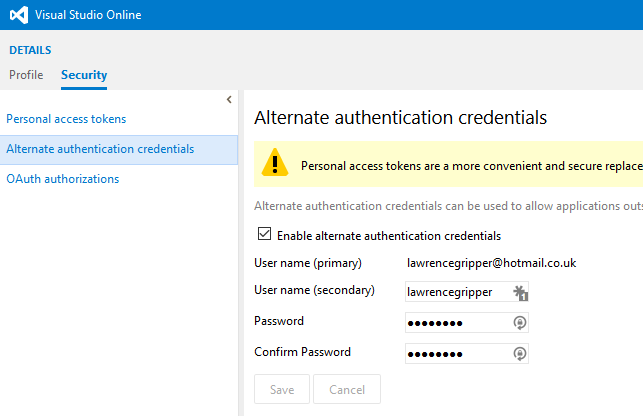
Now the agent is configured and running, it will start spitting out errors. Don’t worry this is expected.
You need to head to the control panel of your VSO instance and click “agent pools” then under the “Default Agent Pool Service Accounts” group add in the user account you used for the agent, like I have below. Once done, you should see the 401 Forbidden errors come to an end on the agent.
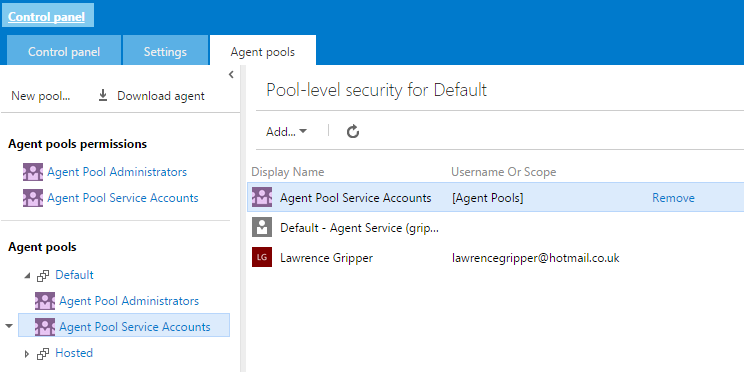
On the “Agent Pools” page under “Default” add a capability to show this agent will support docker. This allows build to distinguish between those that do and don’t, we’ll use a demand later to specify this requirement. (I’ve got two other agents in this, you’ll hopefully only see one).
 N.B You will want to setup the Agent to run as a Service, here is a guide but it don’t yet support linux. https://github.com/Microsoft/vso-agent/blob/master/docs/service.md. I worked around this by using forever, a util to run node scripts as services like so (although this won’t span restarts it will get it started and keep it running in the background):sudo npm install forever –g
forever start agent/vsoagent.js -u yourVSOUsernameHere -p yourVSOPasswordHere
That’s it, your agent is up and running
Setup the Build
Now jumping back into the VSO build screen, under your project, we can setup the build (remember this is new build system with nice composable tasks not the old XAML based system). This will run a shell script which will do our docker build then publish the image.
Let’s walk you through the app, it’s a nice little NodeJS hello world app from Dockers guide - https://docs.docker.com/examples/nodejs_web_app/Firstly, it has a DockerFile to define what needs to be done by docker to build the app, this one is nice and simple as we’ve got some pre-reqs to install and a server.js file which needs to be run. It looks like this:
FROM centos:centos6
# Enable EPEL for Node.js
RUN rpm -Uvh http://download.fedoraproject.org/pub/epel/6/i386/epel-release-6-8.noarch.rpm
# Install Node.js and npm
RUN yum install -y npm
# Bundle app source
COPY . /src
# Install app dependencies
RUN cd /src; npm install
EXPOSE 8080
CMD [“node”, “/src/server.js”]
Then we move away from the Docker guide as we add in our build script. This builds the docker container, logs into docker hub, pushes the image to the hub then logs out and clears the image. This could be converted into a custom build task using the new task model but I’ve left it as a script for the time being to keep it simple, you can see how to build out a customer task here if you’re curious https://github.com/Microsoft/vso-agent-tasks.
This is the script the agent which we just built will run for us.
(NB. The tag identifies the repository to upload the container to, in this case lawrencegripper/nodedemo, you’ll want to update this once you’ve created the repository a bit later)
echo “———————————-”
echo “current dir: "
echo $PWD
echo “———————————-”
echo “starting build”
echo “docker build –t lawrencegripper/nodedemo .”
docker build -t lawrencegripper/nodedemo .
echo “———————————-”
echo “Pushing image to repository”
docker login -u dockerHubusernamehere –password=dockerHubpasswordhere -e emailaddressForDockerHubHere
docker push lawrencegripper/nodedemo
echo “———————————-”
echo “Clean up - Logout and remove image”
docker logout
With these files in place we can now configure the build. We want to target out Linux agent so under general we select the “Default” build Queue then add a demand for “docker” to the demand list.
This causes the build to run on the agent we setup and only on agents with docker installed (remember setting the capability earlier on the agent, this was so the demand would work).
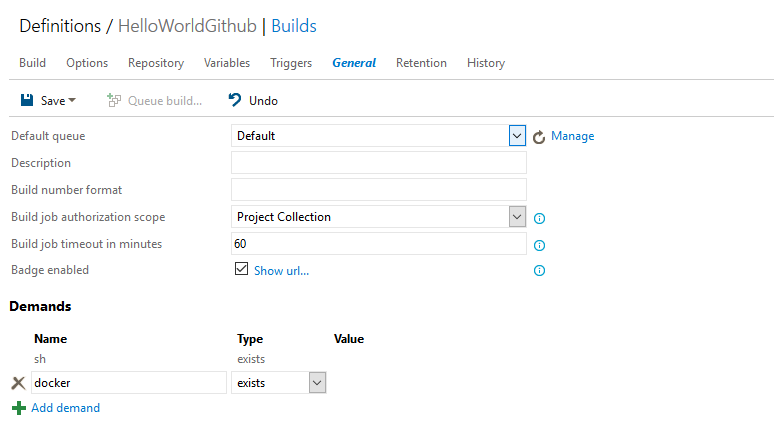 We then add in the “Shell Script” task to the build and set it up to execute out script, which is checked into our repository.
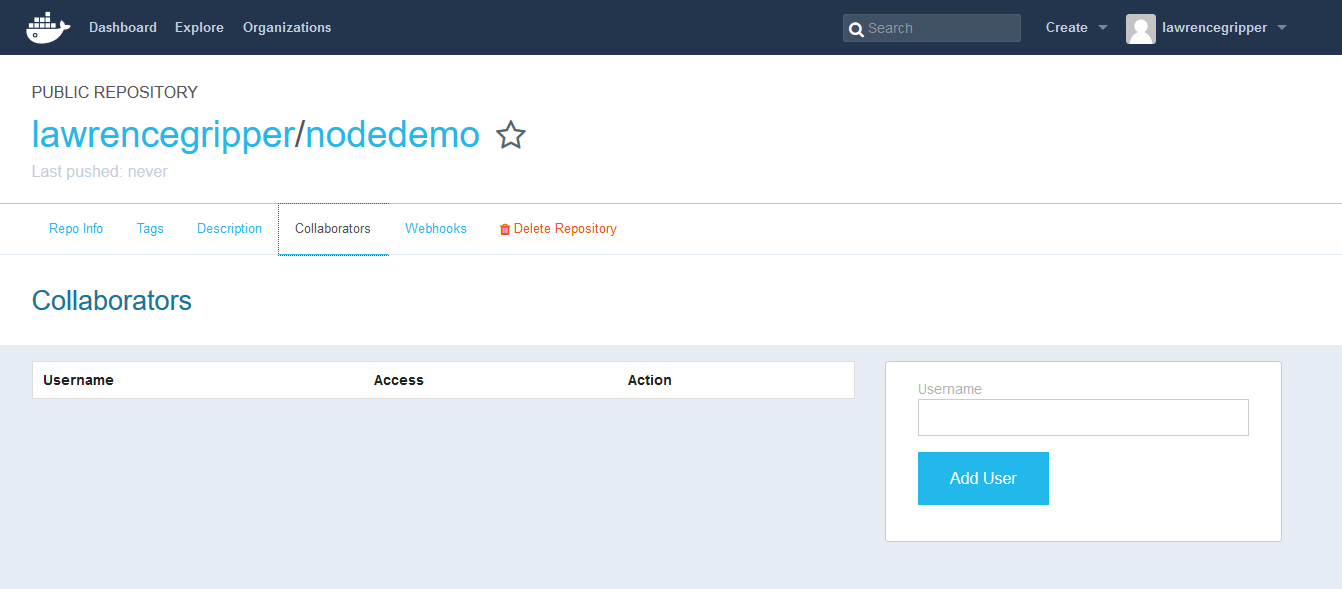
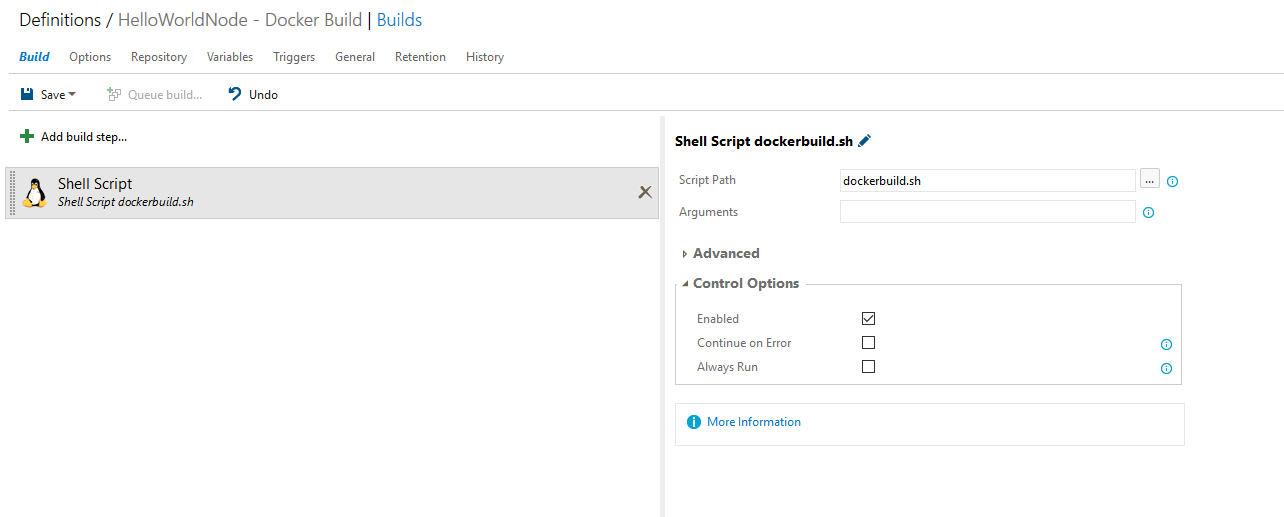 Now the next step is to setup a repository for the docker image to be pushed to. To make this guide simple, I’m using a public docker repo on docker hub, you can sign up at hub.docker.com and set one up, like below.
Notice the repo name maps to the tag we used, “lawrencegripper/nodedemo”, when building the image in the script so you’ll need to update this so it matches your repository.
 You can then queue a build and should see the output from the Linux agent as it builds the docker image and uploads it to the hub.
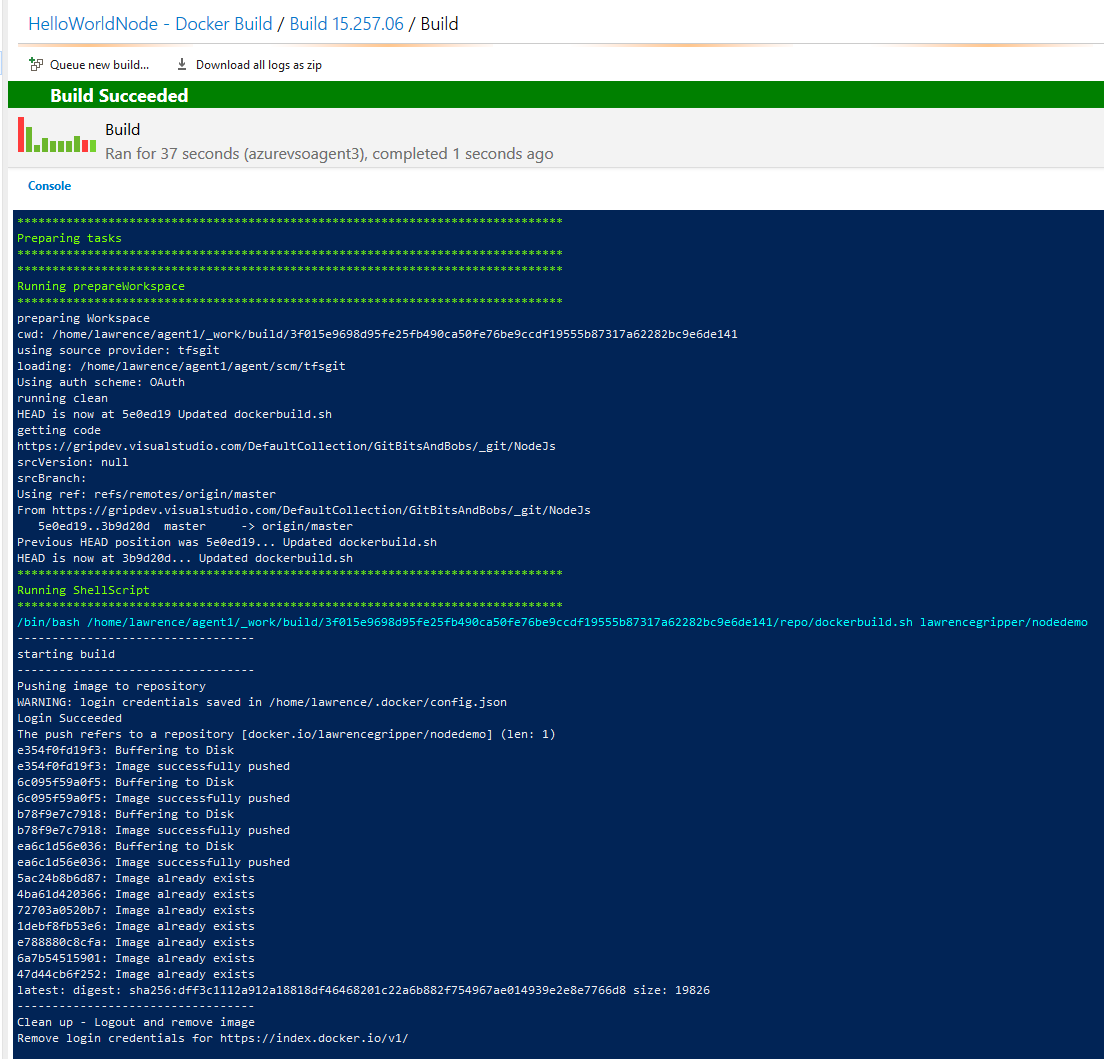 Done we’ve build the nodejs app into a container and uploaded it to docker hub using VSO, you’d likely want to tweak this process but hopefully a good starting point to show what can be done. Next up is orchestrating the release of this onto an environment, I’ll look to get this done in my next post. Let me know how you get on and if this is useful.